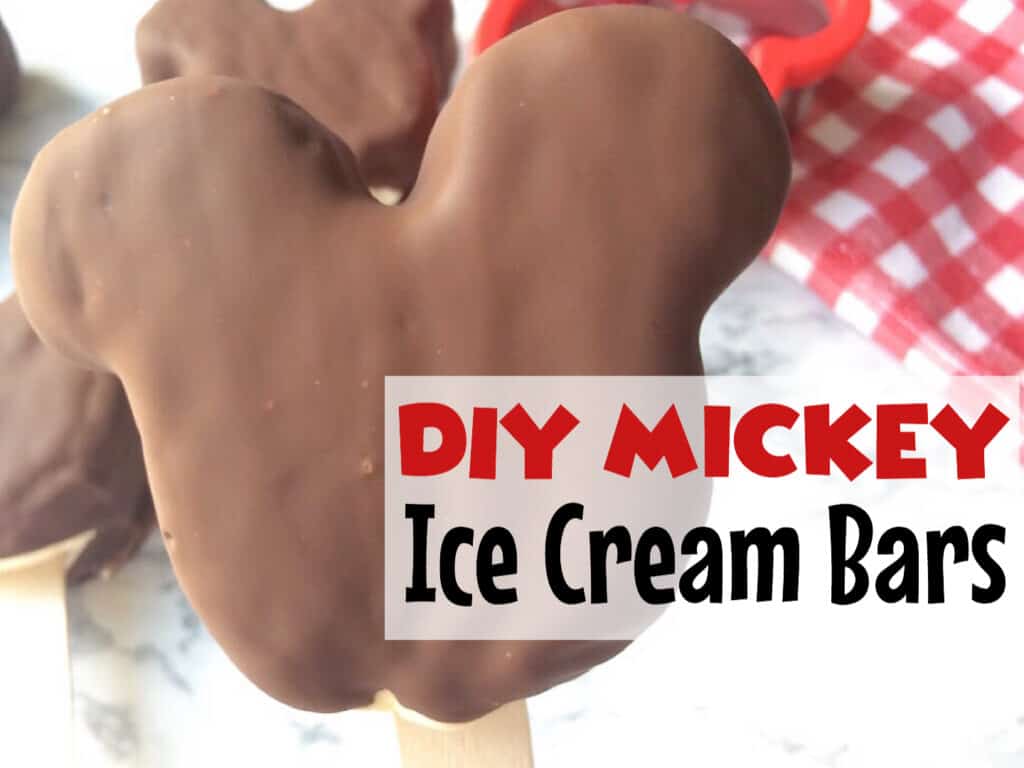
Make these easy Homemade Mickey Mouse shaped Hand Dipped Ice Cream Bars with your choice of ice cream covered with homemade magic shell. A fun way to bring some "Disney magic" home!
This post may contain affiliate links. When you click on these links, I get a small percentage back at no cost to you! For more information see my disclosure policy.
Mickey ice cream bars are definitely one of my family's favorite Disney snacks! We get one almost every time we visit. Sometimes between trips, it's fun to bring a little Disney magic home. What better wayt o cool off on a hot day than with a Homemade Hand Dipped Mickey Bar!
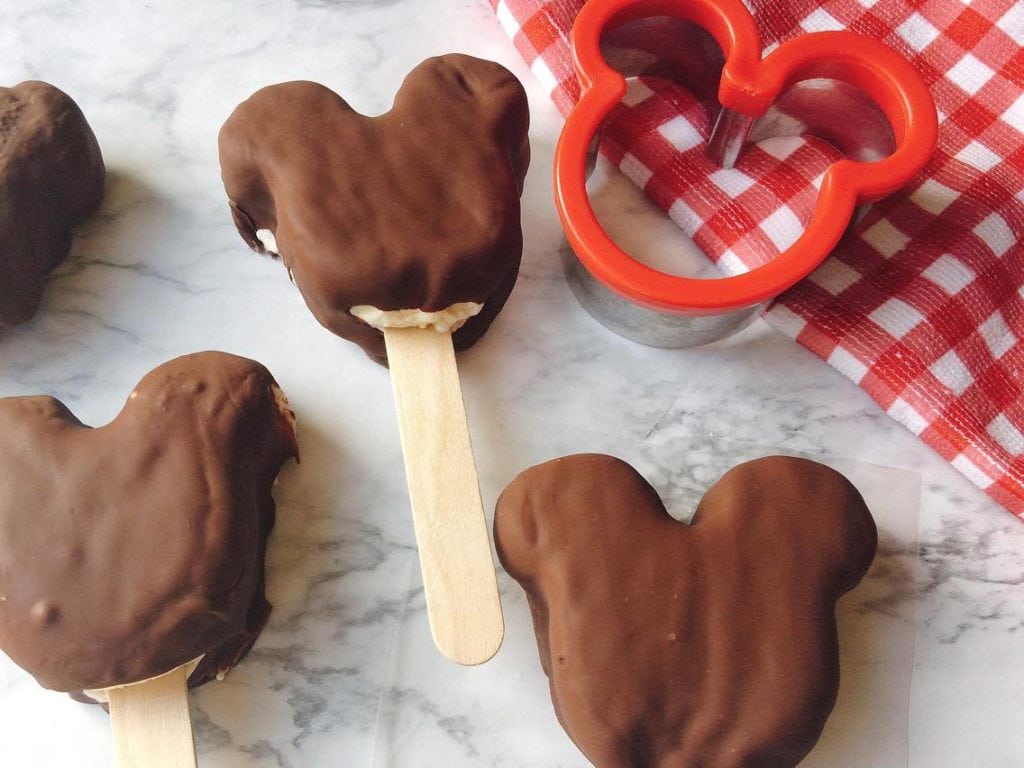
Last time I was at Walt Disney World, I picked up this awesome Mickey Mouse Sandwich Cookie Cutter which is what I used to shape these Mickey Ice Cream Bars. I have also used this cookie cutter to make Mickey-shaped sugar cookies as well as Homemade Mickey Beignets.
It is also great to cut out cute Mickey Mouse peanut butter and jelly sandwiches for my kids. These ice cream bars are not hard to make. I made them using store-bought ice cream, so the "tough" part is already done for you.
When you choose your ice cream, make sure that is the kind that is sold in a rectangular box. It is so much easier to shape.
Ingredients & Materials
- Block of Ice Cream
- Large Knife
- Parchment Paper
- Mickey Mouse Cookie Cutter
- Craft/Popsicle Sticks
- Chocolate Chips
- Coconut Oil
How to Make Mickey Bars
Step 1
- Remove the cardboard packaging from the ice cream.
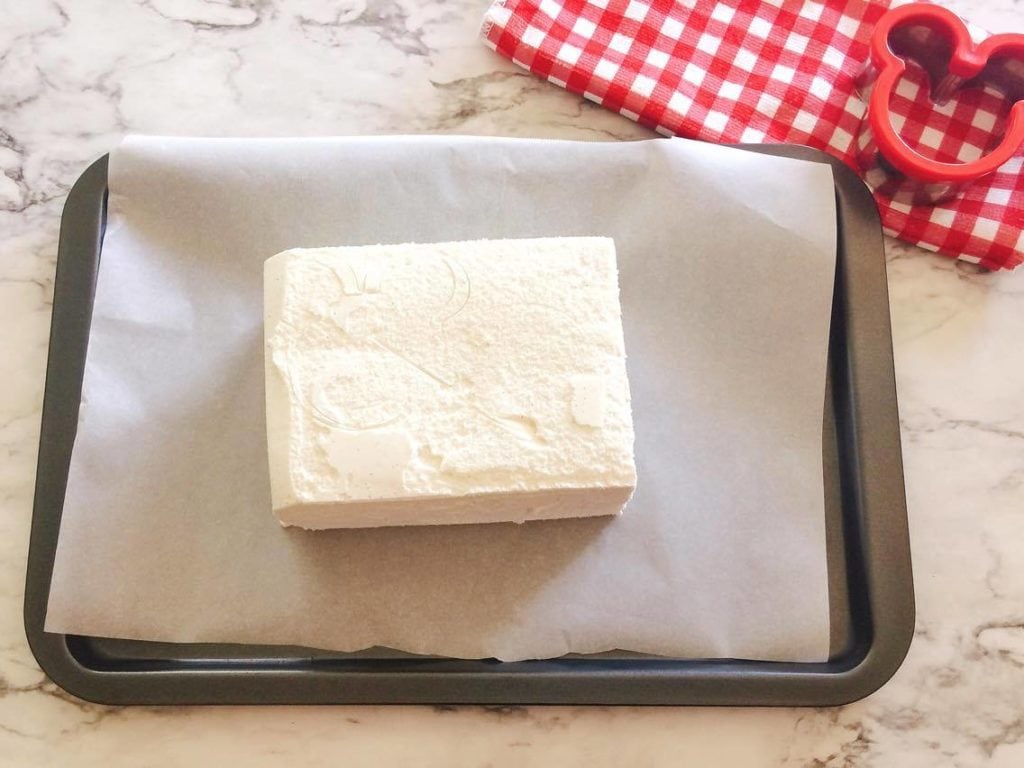
Step 2
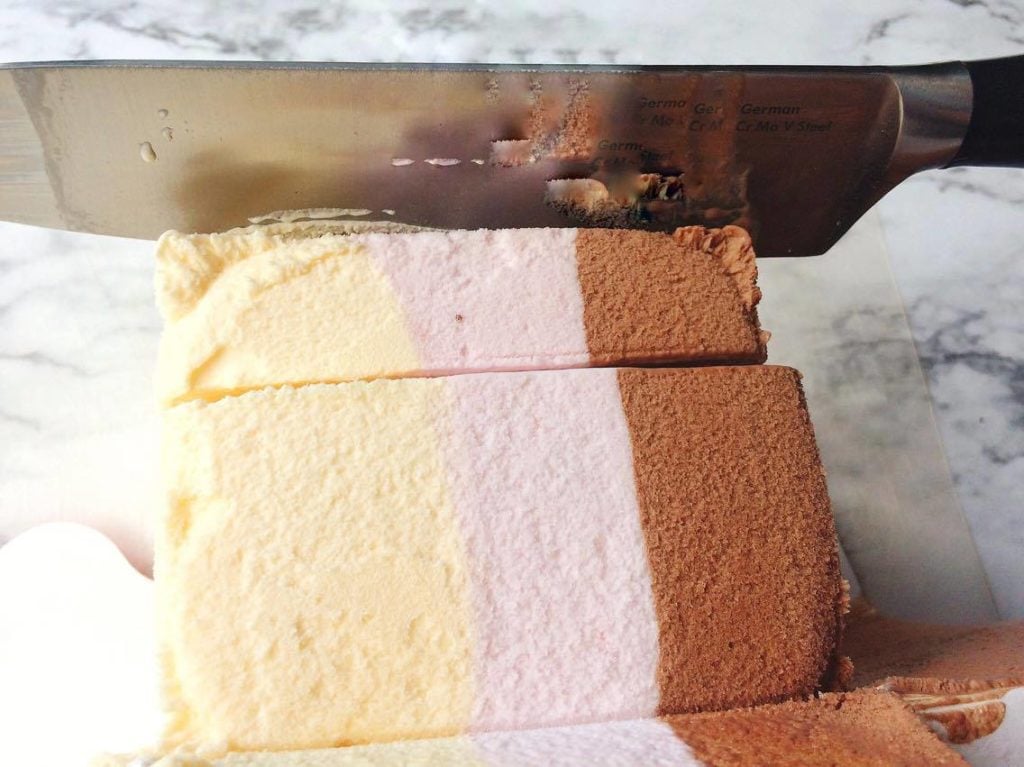
- With the ice cream block standing, slice it into thirds, placing each third on a parchment covered baking sheet.
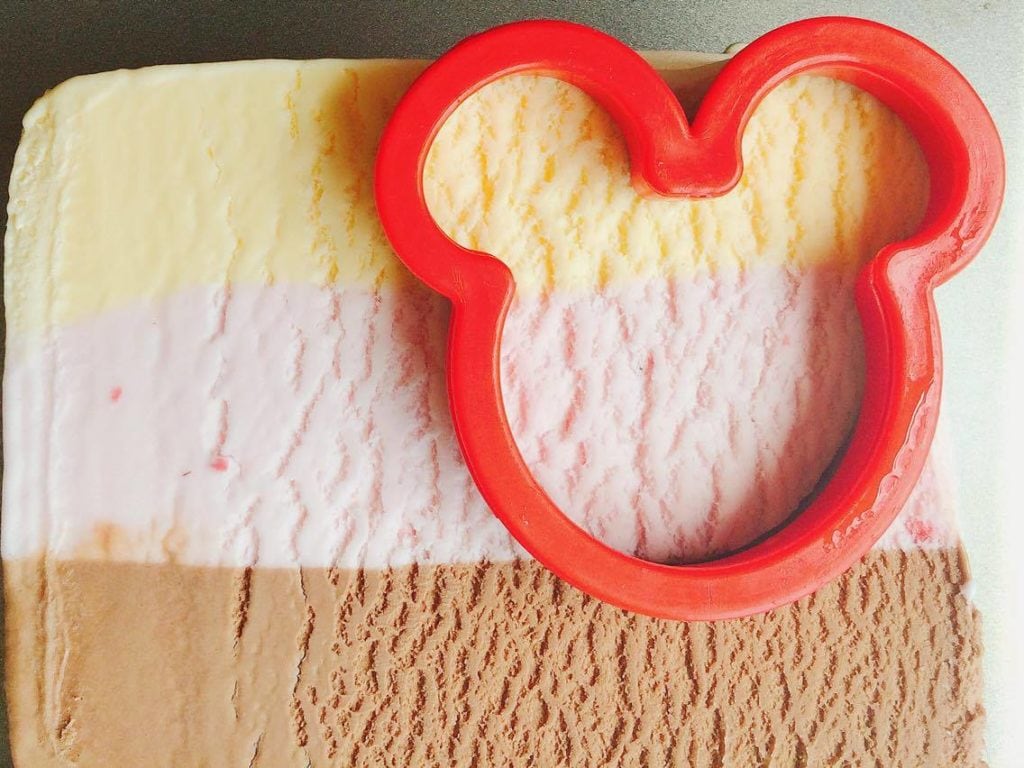
Step 3
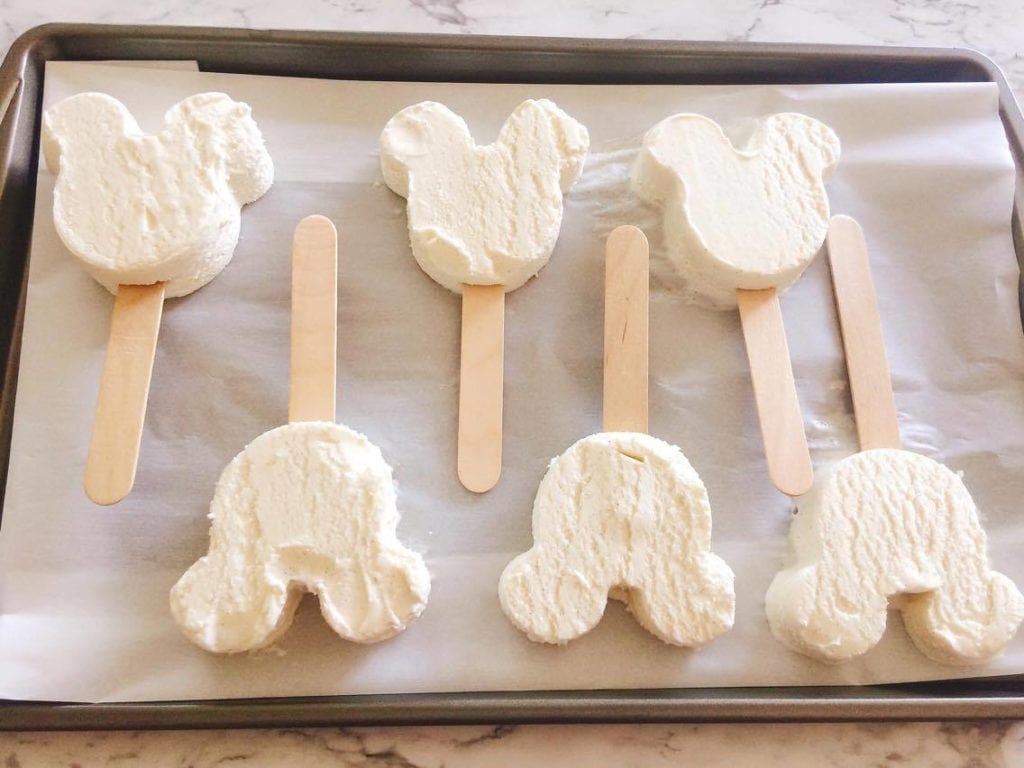
- Use your cookie cutter to cut the Mickey shape in each slice of ice cream. You will be able to get two Mickey bars from each slice, for a total of 6 Mickey Mouse Ice Cream Bars.
Step 4
- While keeping the ice cream inside the cookie cutter, transfer the ice cream bar to another parchment lined cookie sheet.
- This is the tricky part. Shake the cookie cutter at an angle so that only the bottom portion of the ice cream sticks out of the cookie cutter.
- Keep the top portion inside so that when you push the popsicle stick in, the bar will keep its Mickey Mouse shape.
- Once the stick is in, you can remove the whole cookie cutter. Repeat with the rest of the bars.
Step 5
- Freeze the Mickey bars for 2-3 hours until the popsicle stick is firm and doesn't move when touched.
- Now it's time to prepare the chocolate for dipping.

Step 6
- Place all of the chocolate chips and 4 tablespoons of coconut oil in a microwave safe bowl.
- Microwave the mixture on 50 percent power for 30 seconds. Remove the bowl from the microwave and stir.
- Repeat these steps until the chocolate is completely melted. It should be thin. If the mixture is too thick, stir in more coconut oil.
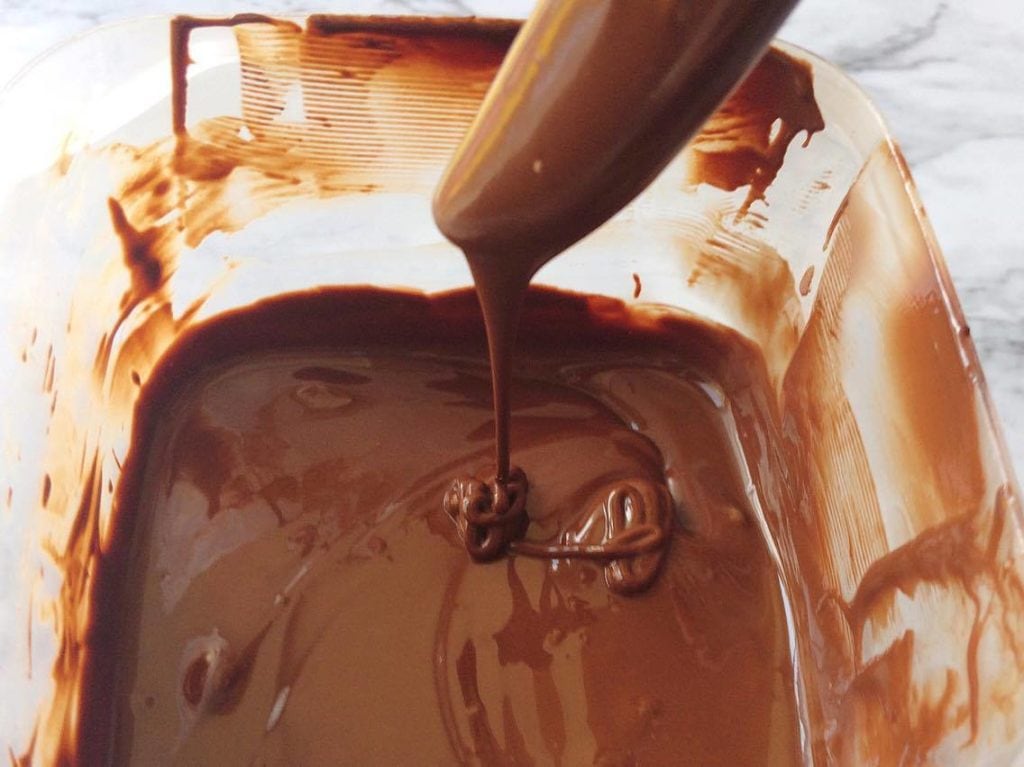
Step 7
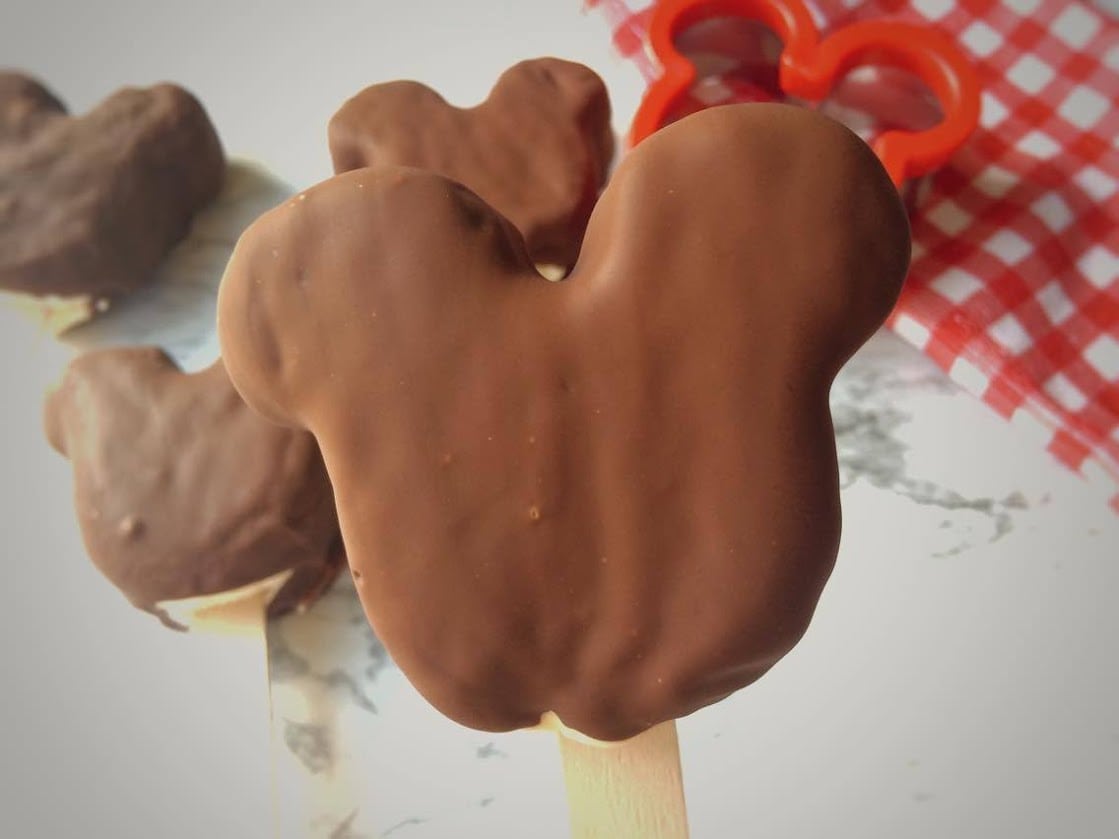
- Put the chocolate in a tall container that is wide enough to fit the Mickey bar. I used a plastic container from IKEA.
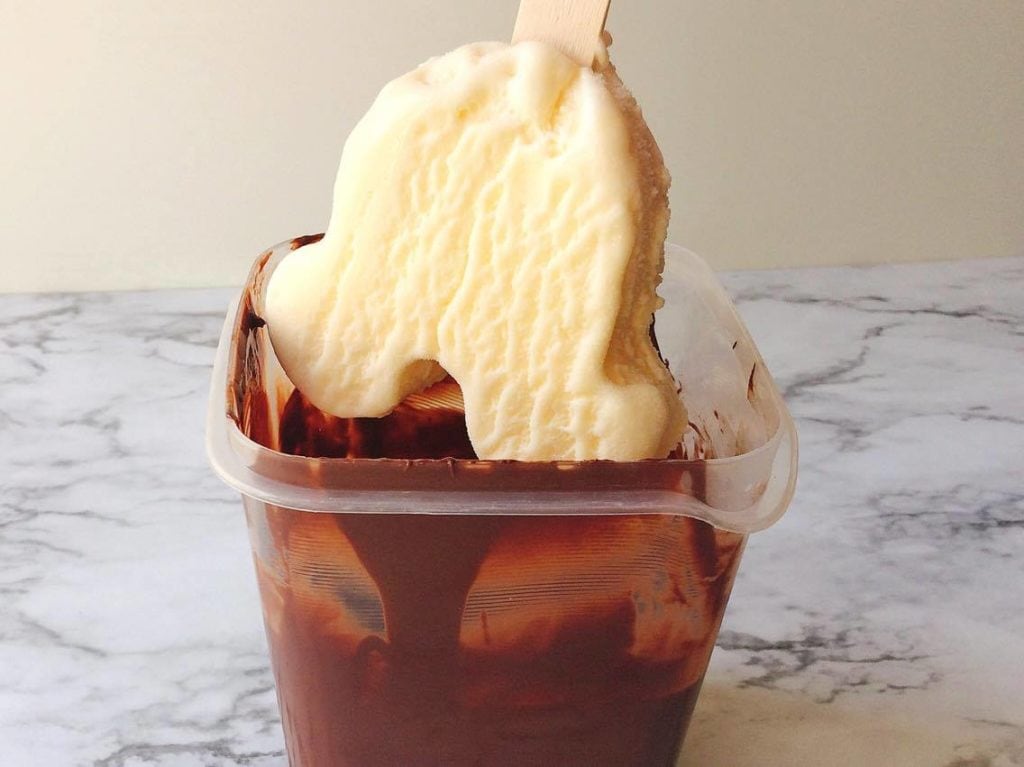
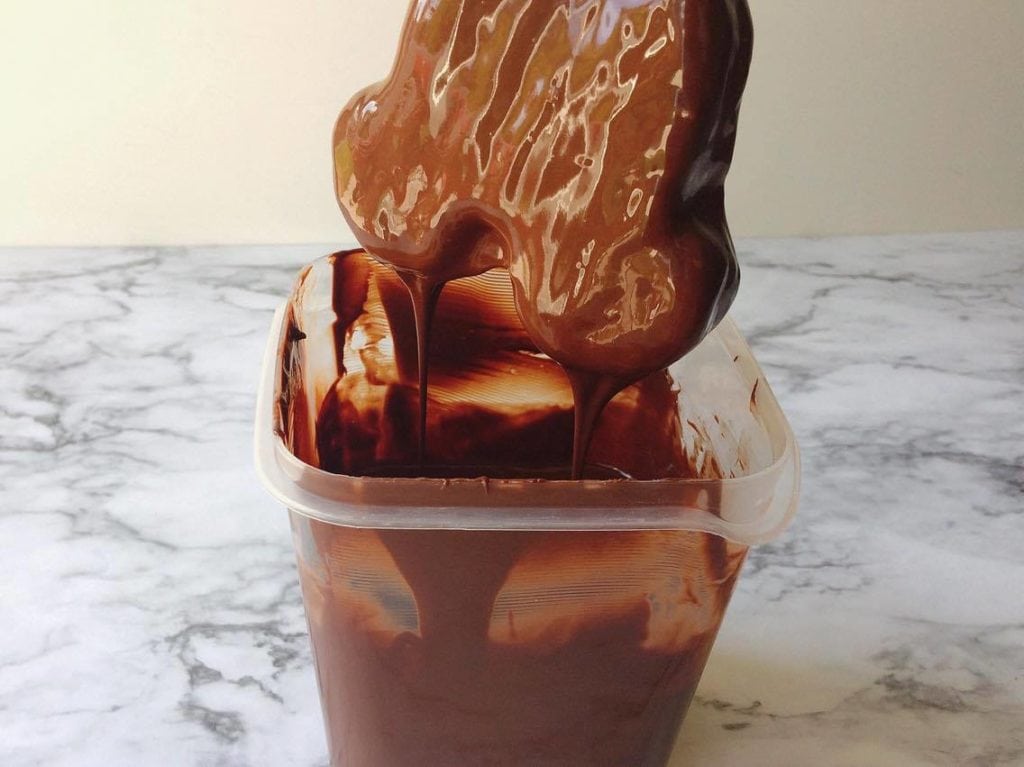
- Holding the Mickey bar upside down, dip it in the chocolate. Remove it and let the extra chocolate drip back into the container.
- Because of the high fat in the coconut oil, the chocolate should harden quickly when it comes into contact with the cold ice cream.

- Place the dipped bars back on the baking sheet and keep frozen until you're ready to serve them!
I hope you have as much fun as I did making Homemade Hand Dipped Mickey Ice Cream Bars! Make sure you pin this recipe so you'll be able to bring a little Disney magic home whenever you want!
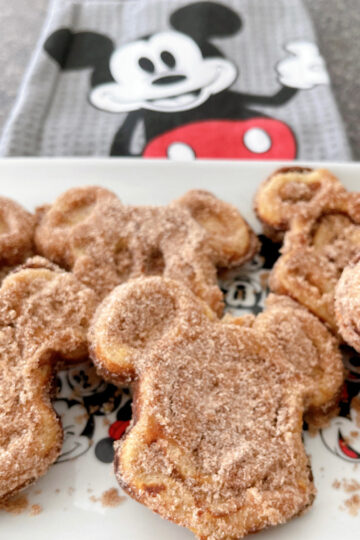
Check out all of my other Disney recipes! Here are a few you might like:
Homemade Hand Dipped Ice Cream Bars
Ingredients
Ice Cream Bars
- 1 Box 1.75 Quart Ice Cream, your favorite flavor
- 6 Jumbo Popsicle Sticks
Chocolate Magic Shell Coating
- 2 Cups Chocolate Chips
- 4-6 Tablespoons Coconut Oil
Instructions
Ice Cream Bars
- Remove the cardboard packaging from the ice cream. With the ice cream block standing, slice it into thirds, placing each third on a parchment covered baking sheet
- Using a Mickey Mouse shaped cookie cutter* (or cookie cutter of your choice), cut the shape into each slice of ice cream. Lift the cookie cutter over to another parchment lined baking sheet.
- Carefully shake the cookie cutter at an angle so the bottom of the ice cream comes out, but the top stays in. Insert the stick and remove the cookie cutter. Repeat with the remaining ice cream bars.
- Freeze the bars for 2-3 hours until the stick is firmly in the ice cream bar.
Chocolate Magic Shell Coating
- Place the chocolate chips and 4 tablespoons of coconut oil in a microwave safe bowl. Microwave at 50 percent power for 30 seconds. Remove and stir. Repeat these steps until the chocolate is completely melted. It should be thin. If the mixture is too thick, stir in more coconut oil.
- Place the chocolate in a tall container that is wide enough to dip the ice cream bar.
Ice Cream Bar Assembly
- Holding the Mickey bar upside down, dip it in the chocolate. Remove it and let the extra chocolate drip back into the container. Because of the high fat in the coconut oil, the chocolate should harden quickly when it comes into contact with the cold ice cream.
- Place the ice cream bars back on the baking sheet and freeze until ready to serve.

Kris Da says
Cupcakes